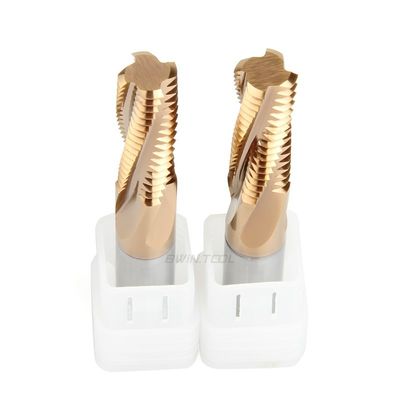
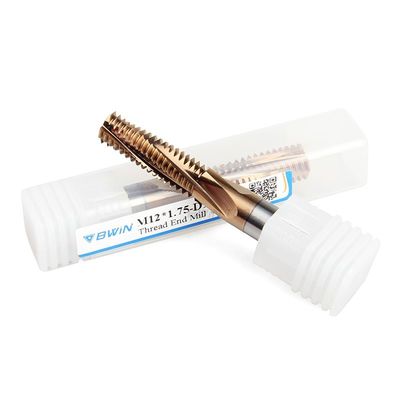
Tungsten ISO Thread End Mill Full Spiral Teeth Threading Milling Cutter
Product Details:
| Place of Origin: | China |
| Brand Name: | BWIN |
| Model Number: | M2.5*0.45 |
Payment & Shipping Terms:
| Minimum Order Quantity: | 1pcs/box |
|---|---|
| Price: | Negotiable |
| Packaging Details: | Plastic box |
| Delivery Time: | 7 work days |
| Payment Terms: | T/T, Western Union |
| Supply Ability: | 1-10000pcs 7days |
|
Detail Information |
|||
| Product Name: | Threading Milling Cutter | Model: | M4*0.7 Full Teeth Spiral Endmill |
|---|---|---|---|
| Material: | Tungsten ISO Threading End Mill | Workpiece: | Steel |
| Usage: | Milling | Coating: | AlTiSiN |
| HRC: | HRC55 | Feature: | Smooth Cutting |
| Application: | Thread Milling | Package: | 1pcs/Box |
| Highlight: | Tungsten ISO Thread End Mill,Thread End Mill Full Spiral,Full Spiral Teeth Threading Milling Cutter |
||
Product Description
Threading Milling Cutter Full Spiral Teeth Endmill Tungsten ISO British American End Mill
Quick Detail:
- Nano coating
- Excellent new blade
- Negative front angle design
- High precision thread
- Chamfering is easy to operate
Description:
- The edge adopts nano coating, with good wear resistance, stable performance, heat resistance and oxidation resistance, and no chemical reaction with the workpiece material; Excellent new edge design is adopted, with smooth surface and no easy angle collapse, giving consideration to the rigidity of the tool and chip removal performance, making the cutting and chip removal of the tool more stable; The cutter head is made by appropriate negative rake angle grinding process, and the spiral design ensures smooth chip removal to prevent sticking to the cutter, reduce heat, and improve the cutting speed; High precision thread, inclined multi chip slot design and spiral heat dissipation design, high efficiency milling, smooth chip removal, no burr; The handle chamfer layout makes it easier to clamp, the chamfer is smooth and bright, the process is excellent, the handle is round and solid, and the handle is beautiful to use.
Milling parameters:
| HRC45 Carbide End Mill |
Tool length | fz&v | |||||
| Short |
1 |
||||||
| Long1 | 0.9 | ||||||
| Overlength | 0.8 | ||||||
| Speciality | 0.6 | ||||||
| Type | Material |
Strength N/mm²
Hardness HRC |
Cooling | ||||
| Air |
Dry cutting |
Lubricating fluid | |||||
| P | PI |
P1.1 |
Non alloy structural steel, free cutting structural steel, carburized steel and quenched and tempered steel | <700 | √ | √ | √ |
| P1.2 | quenched and tempered steel | <1200 | √ | √ | √ | ||
| P2 | P2.1 | Alloyed nitrided steel, carburized steel and quenched and tempered steel | <900 | √ | √ | √ | |
| P2.2 | Tool steel, bearing steel, spring steel and high-speed steel | <1400 | √ | √ | |||
| P3 | P3.1 | Tool steel, bearing steel, spring steel and high-speed steel | <900 | √ | √ | √ | |
| P3.2 | Tool steel, bearing steel, spring steel and high-speed steel | <1500 | √ | √ | |||
| Sloting | ||||||||||||
| Vc (m/min) |
fz(mm/Tooth) | |||||||||||
| Diameter | ||||||||||||
| 2 | 4 | 6 | 8 | 10 | 12 | 16 | 20 | |||||
| 112 | 0.01 | 0.018 | 0.026 | 0.034 | 0.041 | 0.048 | 0.06 | 0.069 | ||||
| 92 | 0.01 | 0.017 | 0.025 | 0.032 | 0.038 | 0.045 | 0.056 | 0.065 | ||||
| 100 | 0.01 | 0.018 | 0.026 | 0.034 | 0.041 | 0.048 | 0.06 | 0.069 | ||||
| 72 | 0.009 | 0.015 | 0.022 | 0.028 | 0.034 | 0.04 | 0.05 | 0.058 | ||||
| 64 | 0.01 | 0.018 | 0.025 | 0.032 | 0.039 | 0.045 | 0.057 | 0.066 | ||||
| 56 | 0.009 | 0.016 | 0.023 | 0.029 | 0.036 | 0.041 | 0.052 | 0.06 | ||||
| Roughing | ||||||||||||
| Vc (m/min) |
fz(mm/Tooth) | |||||||||||
| Diameter | ||||||||||||
| 2 | 4 | 6 | 8 | 10 | 12 | 16 | 20 | |||||
| 228 | 0.018 | 0.031 | 0.045 | 0.057 | 0.070 | 0.081 | 0.101 | 0.118 | ||||
| 208 | 0.017 | 0.029 | 0.042 | 0.054 | 0.065 | 0.071 | 0.095 | 0.11 | ||||
| 184 | 0.018 | 0.031 | 0.045 | 0.057 | 0.070 | 0.081 | 0.101 | 0.118 | ||||
| 144 | 0.015 | 0.026 | 0.037 | 0.048 | 0.058 | 0.068 | 0.085 | 0.098 | ||||
| 132 | 0.017 | 0.03 | 0.042 | 0.054 | 0.066 | 0.077 | 0.096 | 0.112 | ||||
| 112 | 0.015 | 0.027 | 0.039 | 0.05 | 0.060 | 0.07 | 0.088 | 0.102 | ||||
| Finish | |||||||||||
| Vc m/min |
fz(mm/Tooth) | ||||||||||
| Diameter | |||||||||||
| 2 | 4 | 6 | 8 | 10 | 12 | 14 | 16 | 18 | 20 | ||
| 332 | 0.028 | 0.05 | 0.07 | 0.091 | 0.11 | 0.128 | 0.144 | 0.16 | 0.173 | 0.186 | |
| 272 | 0.026 | 0.046 | 0.066 | 0.085 | 0.103 | 0.12 | 0.135 | 0.15 | 0.162 | 0.173 | |
| 304 | 0.028 | 0.05 | 0.07 | 0.091 | 0.11 | 0.128 | 0.144 | 0.16 | 0.173 | 0.186 | |
| 212 | 0.023 | 0.041 | 0.059 | 0.076 | 0.092 | 0.107 | 0.121 | 0.134 | 0.145 | 0.155 | |
| 196 | 0.027 | 0.047 | 0.067 | 0.086 | 0.104 | 0.122 | 0.137 | 0.152 | 0.165 | 0.177 | |
| 168 | 0.024 | 0.043 | 0.061 | 0.079 | 0.095 | 0.111 | 0.125 | 0.139 | 0.150 | 0.161 | |
- If the following carbide end mill cannot meet your requirements, we support OEM customized production. The diameter of 0.2mm to 25mm, the total length of 50mm to 200mm, 4F, 5F, 6F, 8F and logo can be customized, including inch size end milling cutter. Please contact us to select or customize non-standard carbide end mill according to your needs.
| M coarse |
P | M Fine |
Outer Diameter | Flute Diameter |
Blade Length |
Overall Length |
| M1*0.25 | 0.25 | >1 | 4 | 0.7 | 4 | 50 |
| M1.4*0.3 | 0.3 | >1.4 | 4 | 1 | 6 | 50 |
| M1.6*0.35 | 0.35 | >1.6 | 4 | 1.1 | 7 | 50 |
| M2*0.4 | 0.4 | >2 | 4 | 1.5 | 7 | 50 |
| M2.2*0.45 | 0.45 | >2.2 | 4 | 1.6 | 7 | 50 |
| M2.5*0.45 | 0.45 | >2.5 | 4 | 1.9 | 7 | 50 |
| M3*0.5 | 0.5 | >3 | 4 | 2.3 | 7 | 50 |
| M4*0.7 | 0.7 | >4 | 4 | 3 | 7 | 50 |
| M5*0.8 | 0.8 | >5 | 6 | 3.9 | 16.4 | 60 |
| M6*1 | 1 | >6 | 6 | 4.5 | 15.5 | 60 |
| M8*1.25 | 1.25 | >8 | 8 | 6.2 | 25.7 | 70 |
| M8*1 | 1 | >8 | 8 | 6.5 | 22.5 | 70 |
| M10*1 | 1 | >10 | 10 | 7.9 | 30.5 | 80 |
| M10*1.5 | 1.5 | >10 | 10 | 8 | 30.8 | 80 |
| M10*1.25 | 1.25 | >10 | 10 | 8.2 | 32.5 | 80 |
| M12*1.75 | 1.75 | >12 | 10 | 9.5 | 35.9 | 80 |
| M12*1.5 | 1.5 | >12 | 10 | 9.8 | 30.8 | 80 |
| M12*1 | 1 | >12 | 10 | 9.9 | 25.5 | 80 |
| M14*2 | 2 | >14 | 12 | 11.5 | 41 | 100 |
| M16*2 | 2 | >16 | 12 | 11.5 | 41 | 100 |
| M20*2.5 | 2.5 | >20 | 16 | 15 | 48.8 | 105 |
Instructions:
1. Before using the carbide end mill, please measure the tool deflection. If the tool deflection accuracy exceeds 0.01mm, please correct it before cutting.
2. The shorter the carbide e extends out of the collet, the better. If the tool extends out longer, reduce the speed, feed speed or cutting amount.
3. In case of abnormal vibration or sound during cutting, please reduce the speed and cutting amount until the situation is improved.
4. Spray type and air jet type are preferred for steel cooling, which can improve the use effect of carbide end mill.
5. Note: Not suitable for low speed machines such as rotary table and electric hand drill.
Applications:
Pre-hardened Steel, stainless steel, Die steel, steel plate, Heat-resistant steel,pipe, copper and aluminum, cast iron, Nonferrous Metal, Wood, Plastic,FRP and sO on. General-purpose operation slotting, rilling, profiling.
![]()
Q1. The tool breaks when cutting in or pulling out the workpiece
The feed rate and cutting depth can be reduced, and the cutting edge length can be shortened to the minimum of the necessary length.
Q2. Tool breaks during normal machining
Reduce the feed rate and cutting depth.
The tool shall be passivated.
Replace the clamp or spring collet.
The tool with high cutting edge number changes the tool with low cutting edge number to improve chip removal and prevent chip blockage.
Replace dry milling with wet milling (using cutting fluid), and use it with vortex tube gun to reduce tool temperature and avoid tool overheating.
If the wet milling fluid supply direction is changed from the front to the oblique rear or transverse top, the coolant flow should be sufficient.
Q3. The tool breaks when the feed direction changes
(1) Use arc interpolation (NC machine tool), or temporarily stop (temporarily) feeding.
(2) Reduce (decrease) the feed before and after the direction change.
(3) Replace the clamp or spring collet.
Q4. Problem: Part of the blade tip breaks
Chamfer the corners with manual grinding.
Change down milling to up milling.


